Photoshop: Levels Adjustment Layer
This article falls under the category of image adjustment and correction.
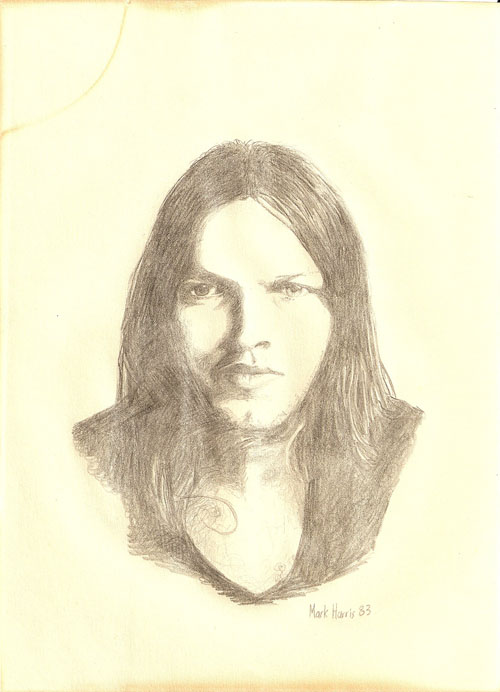
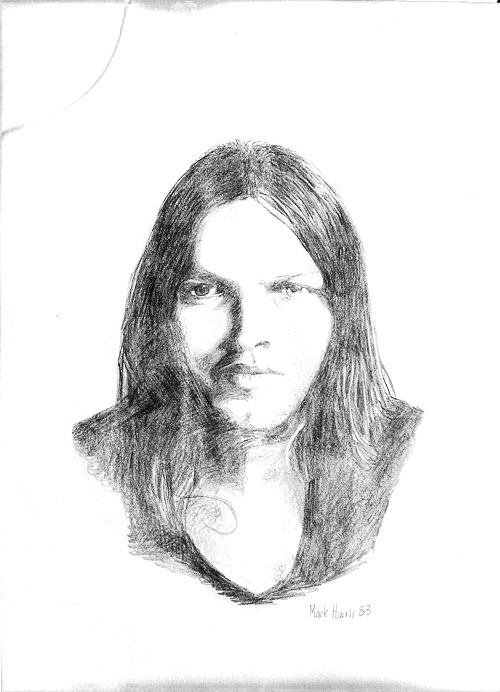
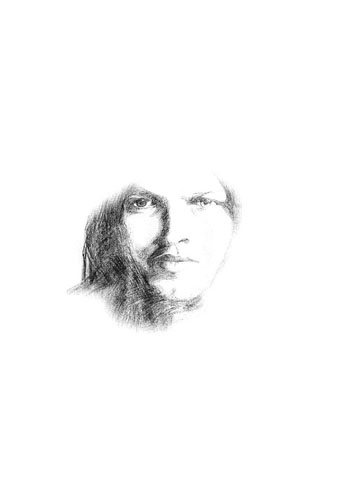
One of the first things we usually need to do when correcting an image is adjust the brightness and contrast. In this article we are going to start with an image from a scanned drawing.
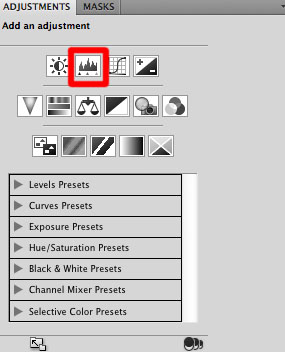
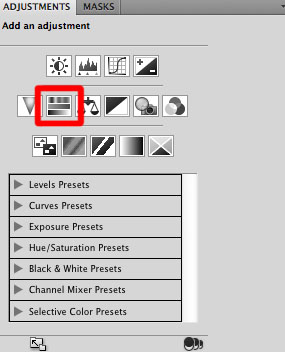
As a common practice I usually duplicate the background layer and then hide the original background layer. It’s like having a backup copy of my image directly available in my layers panel. You need to open the Adjustments panel and click on the Levels button.
In the levels panel you will see a graph that represents the amount of pixels at all levels starting with solid black on the left and ending with solid white on the right. You can see in the graph that there is almost no pixel content up until where I have indicated with the red arrow. If we take the black slider and move it up to where the arrow indicates, the dark areas of the drawing look even darker. Due to the age of the drawing the paper has turned yellow and the paper has warped from moisture damage. To make the paper look brighter we want to grab the white slider and bring it to the left a bit.
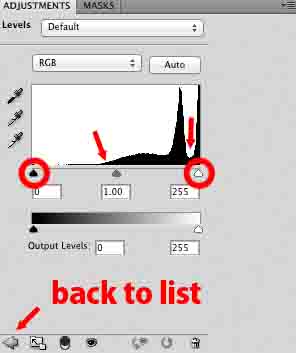
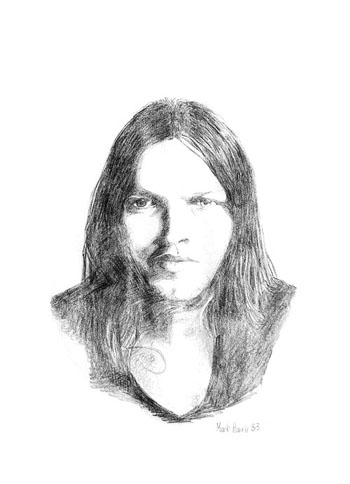
In the unadjusted scan the yellowing effect is somewhat mellow and for some purposes may even be desired. Once we start adjusting however the effect looks harsh. Because there is no colour in the original drawing we can remove the colour altogether. Rather than change the mode of the image, lets use another adjustment layer. It is important to note the location of the Back To Adjustment List button in the levels panel (see above figure - this arrow appears in all adjustment panels and is the quickest way to add another adjustment layer). We need to go back to the adjustment list and select Hue/Saturation. Grab the Saturation slider and pull it all the way to the left.

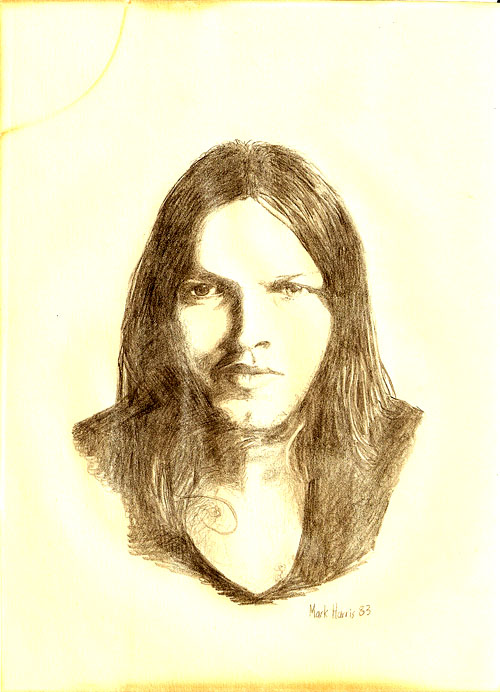
You will see the yellow has disappeared. We can always add back in a touch of yellow for effect if we decide later. We couldn’t do that if we switched to grayscale mode. You should now also note that you can see the two adjustment layers you have created in the layers panel. (You can also see that an empty mask has automatically been added in each instance. You can actually mask out parts of the adjustment layer!) Remember that your adjustment layers only affect layers that are underneath them.
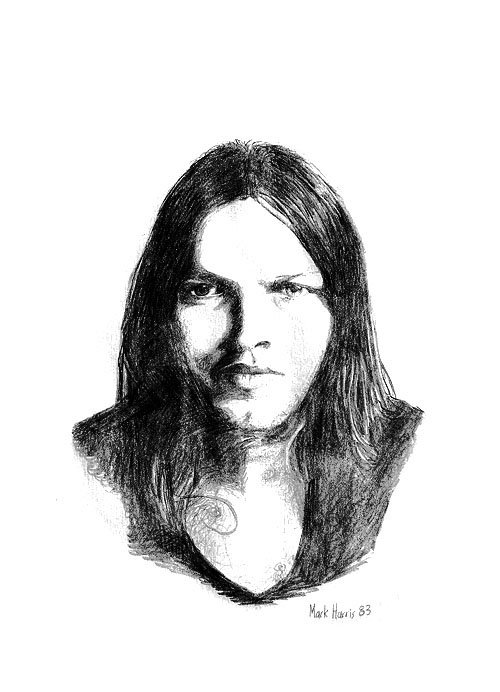
We can now select the Levels adjustment layer and pull back the white slider even more, without having to worry about the yellowing effect.
There are still damage areas around the outside of the drawing. We could pull these out with the white slider but that would destroy the quality of drawing in the center. Instead we will make use of a mask. Even though it really has nothing to do with the adjustment layers themselves, I am going to discuss it in the article because I can never stress enough the importance of masks in your Photoshop work.
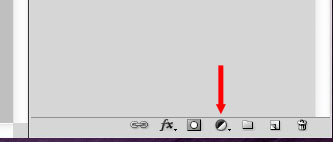
To start we need to select the Background copy layer. In the toolbar at the bottom of the layers panel click the fill layer button and select ‘Solid Color…’. Pick white for the colour. You should see your white fill layer and there should be a mask that has automatically been added to that layer.
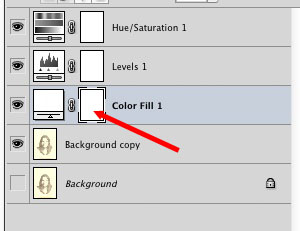
Select the mask thumbnail for the new fill layer. You can now paint on the mask. You can only paint on a mask in grayscale. You will notice that once you select a mask your foreground / background swatches in the toolbar change to black and white. Select a 100px soft brush with black as your colour. Adding black areas to a mask makes that part of the layer transparent. Gray areas are semi-transparent. You can now paint back in the portrait area of the drawing and leave out the edges. If you make a mistake and add too much black you can switch your brush colour to white and paint out the affected areas. The ‘x’ key on your keyboard is a handy shortcut for switching between black and white (foreground and background) while working on a mask. Sometimes mask painting can be quite intense. (See Photoshop: Getting Into Layers for a good example.)
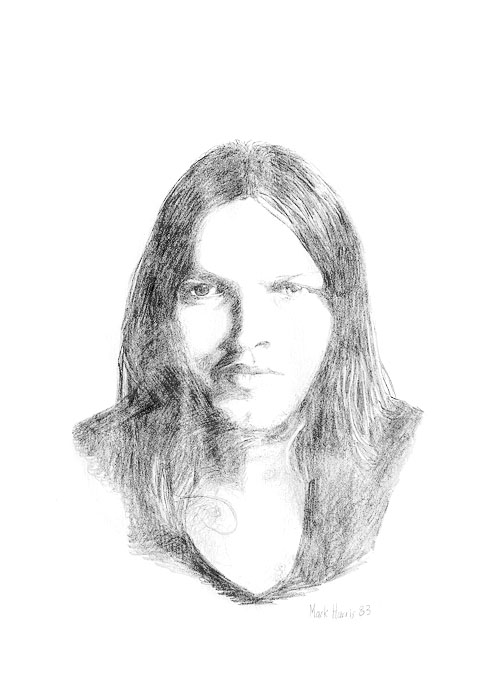
You can fine tune your Levels adjustment layer be using the gray (midtone) slider located between the black and white sliders used previously. For darker midtones move the gray slider to the right.
For lighter midtones move the gray slider to the left.
I have focused on fundamental aspects of the Levels adjustment panel but there are other features like the eyedropper buttons which allow you to sample black and white points directly from the image. You can also adjust levels on the individual colour channels.
