WordPress: Adding Pictures
Adding pictures in Wordpress is a fairly straightforward process. For the best results however you need plan ahead a bit. The first thing I recommend is deciding how large you want your picture to be. If the picture is going to be small you have the option a placing the picture on the left or right side of the article and having the text wrap around the picture. The much simpler scenario is a picture which covers the full, or nearly the full width of the article.
To illustrate the simplest way of getting a picture into a page lets look at the ‘Sample Page’ that comes with the default Wordpress installation. The first thing we need to know is where the image file resides on your computer. It’s a good idea to have a folder specifically for images you may want to include on your website.
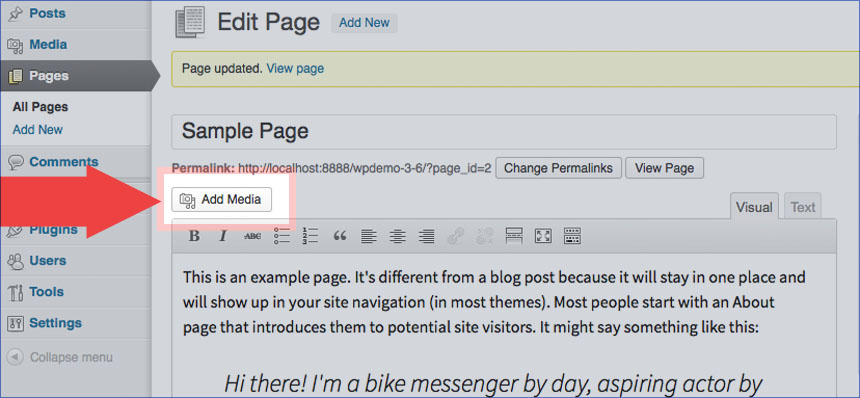
Select the page or post you want to edit (in this case Pages > All Pages > Sample Page) - Position the cursor at the position within the text where you want the image to appear. Since we are adding a full width picture you can just position the cursor on a blank line above or below a paragraph.

Click the ‘Add Media’ button. You can drag and drop files into the upload area or use the ‘Select Files’ button. Once your file is uploaded you will see it selected in the Media window. On the lower right hand side of the window there is an Area labeled ‘ATTACHMENT DISPLAY SETTINGS’. The last option is size. If you’re using the twentythirteen theme the ‘Large’ option has the width conveniently set to match the full width of the page text. If you use this option you can set the alignment to ‘None’. I usually set the ‘Link to’ option to ‘None’ as well unless you want the user to be sent to an attachment page or directly to the full size image file when they click on the image

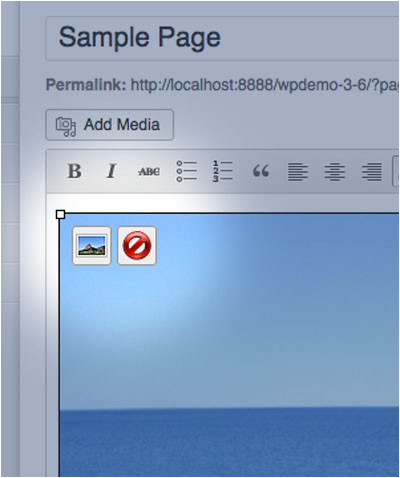
Now you can click ‘Insert into page’. If you are satisfied with the results you can update the page. You can remove pictures or change their settings at any time by clicking on a picture in the edit window. A set of buttons should appear. The left button allows you to change the settings for that picture. The right button will remove the picture entirely. The picture will remain in the ‘Media Library’ so you wont have to upload it again if you decide to use it in the future.
One thing to remember is that pictures taken at high resolution can be very large files. WordPress can handle large files and do some resizing behind the scenes but your upload times might be quite long depending on your internet connection. If you have a lot of pictures it can also take up a lot of space on your server. If you know how to resize images you may want to limit them to 1000 or so pixels in width before you upload them. High resolution pics are often more than 4000 pixels wide. (For those using applications like iPhoto you can read this article to learn how to resize your image files.) Also make sure the original images aren’t too small. A full width picture should be at least 1000 pixels wide to be on the safe side - half width, 500 pixels, and so on. Check the file information using Windows or the Finder in OS X to determine image sizes.
