Resizing Images With Gimp
Gimp is an open source photo editing and graphics application which can be an ideal option if you are in need of some graphics software but can’t justify the expense of running Adobe Photoshop. Gimp has text capabilities as well as paths and there are some handy built in effects. You can use layering to create composite images just as you would using Photoshop.
A simple editing task like resizing is fairly straightforward with Gimp. Once the file is open simply choose Image > Scale Image… from the main menu and choose your dimensions. You can automatically constrain the aspect ratio just like in Photoshop. You can also choose a different resolution if needed. 72 pixels per inch is good for the web.
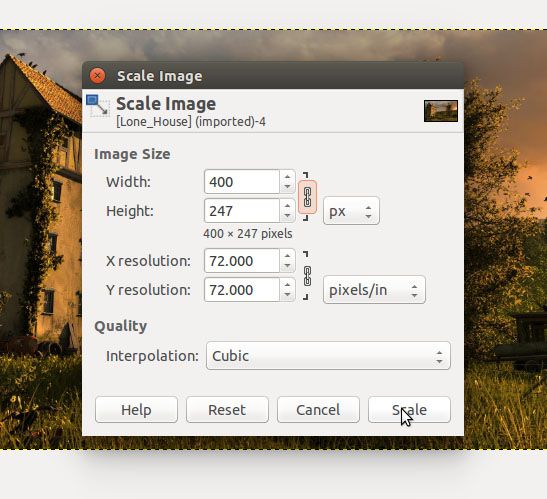
The default cubic interpolation can be left as is. Click Scale and you’re done. You should save the file under a different name if you want to preserve the full resolution photo. This always a good idea if you ever need the photo for large screen or print applications. In fact, I try to make a habit of saving the file under a new name before I resize it. When you want to save a jpeg or png in Gimp you use the export functions such as File > Export As… in this case where we want to create a new small version of a photo.
If you are wondering what GIMP stands for, it is an acronym for Gimp Image Manipulation Program, which qualifies it as a recursive acronym meaning that a letter in the acronym stands for the actual acronym; just in case you thought acronyms weren’t already out of control.
