Photoshop: Masks Unmasked
The first time I ever opened up a photoshop program many years ago I was somewhat mystified by the concept of layers and I was mystified even more when I saw the ‘Add Layer Mask’ button.
The beauty is that layers and masks haven’t changed much. They were fundamental tools back then, still are today and probably will be for a long time to come.
What Is a Mask?
When we look at the term mask, we will be be discussing it as it relates to Photoshop. Specifically, we are looking at the Layer Mask. Ultimately what a mask allows us to do is add transparency to a layer in any location, to any degree. Technically, we are manipulating the alpha channel for that layer.
When you create an RGB image you have a red, green and a blue channel. The value for each pixel for each channel determines the final colour of each pixel. But there is also an alpha channel that determines the transparency of each pixel and every layer has an alpha channel. When you change the Opacity value of an individual layer in the Layers panel for example, you are changing the alpha channel value for every pixel in that layer. When you create a layer mask you are creating a black and white picture which will represent the transparency (the alpha value) of each pixel in that layer. Black represents 0 alpha or fully transparent while white represents 1 alpha or fully opaque. Various shades of grey represent alpha values between 0 and 1 or varying degrees of transparency.
Adding a Mask
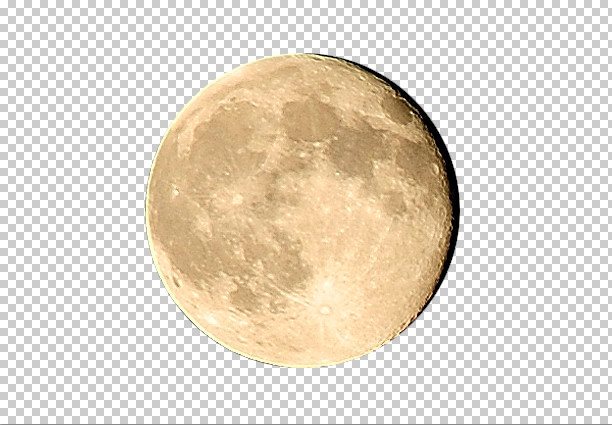
It is very important when adding a mask in photoshop to have a context or purpose for the operation. In some instances masks are automatically added for us when we create shape layers, fill layers or adjustment layers. One of the most common purposes for adding a mask is to remove part of a layer. The best way to illustrate this is by looking at an example. Lets start with this simple photo of the moon.
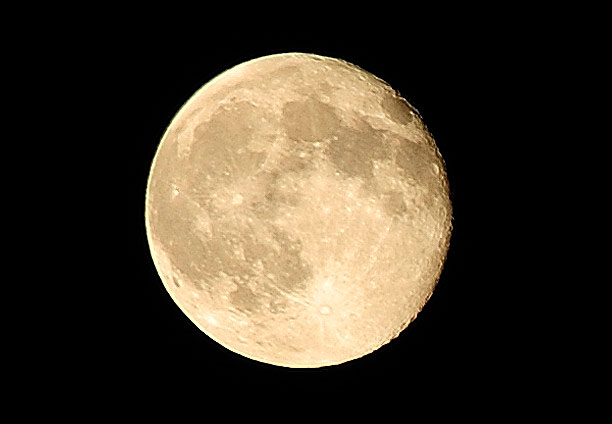
If you open this jpeg file in Photoshop you end up with the photo as the background layer. Right off the bat we have to consider an important fact about masks. You can’t apply a mask to the background layer. What we will do is duplicate the background layer. You can do that from the main Layer menu or the pop-up menu in the Layers panel. When you duplicate a Layer you immediately have the option to change the default name (in this case ‘Background copy’) to whatever you choose. To keep things simple we will delete the original background layer once we have made our copy. This can also be done from the main Layer menu or the Layer panel pop-up menu.
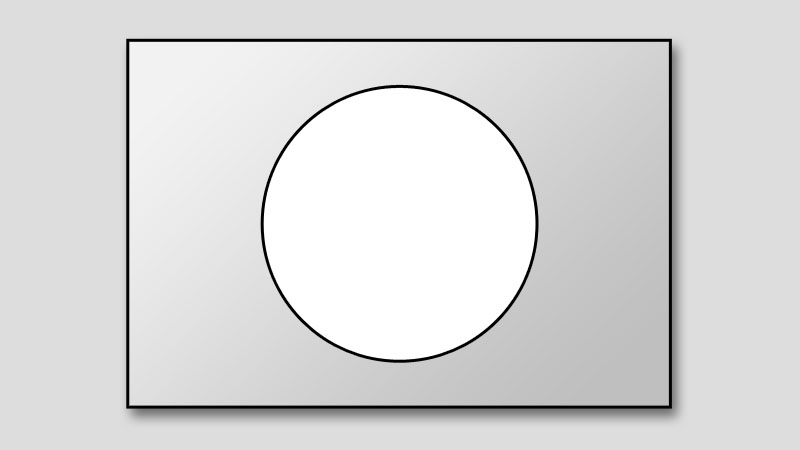
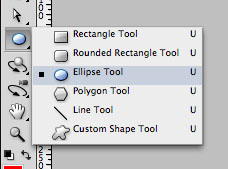
Our objective here will be to remove the black background from the layer leaving only the moon. To do this we will use the elliptical marquee selection tool.
Holding down the Shift key while clicking and dragging keeps the selection a perfect circle. If you also hold down the spacebar while performing this operation you can move your circle around which allows you to center it over the moon. You will notice that the perfect circle should end up enclosing a little bit of the shadowed part of the moon on its right. In this case we want to keep the entire circular shape of the moon. You don’t have to worry about being too accurate here as this is just an exercise in creating a mask. Later on I will outline a much superior method of creating this mask.
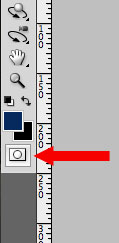
Once we are satisfied with our selection we will create our mask. To do this we will click the ‘Add layer mask’ button in the Layers panel.
Now you should see the moon as a disc with a checkerboard pattern indicating transparency.
You should also see a layer mask thumbnail next to the layer thumbnail and a small chainlink icon between the two thumbnails. That chainlink icon tells you that the mask will move and transform with the layer if you perform those types of operations. The vast majority of the time you will need this behavior. If for some reason you do not, you can always toggle the link by clicking it.
If you were to save this file right now as a jpeg, Photoshop would place the layer over a white background and save the image. Jpeg’s do not support transparency. Saving the file as a PNG however does preserve transparency. If you were to use a png file on a web page the background of the web page would show through the transparent areas of the image.
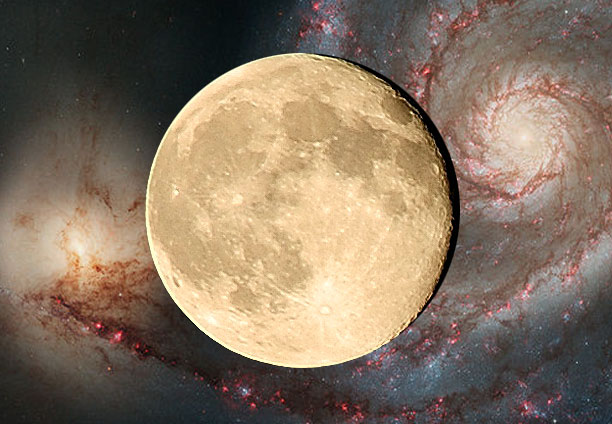
Now that we have added this transparency to the moon layer we can do more than just save it as a PNG file. Our layer can become part of a composite image. To illustrate this lets take a galaxy image.
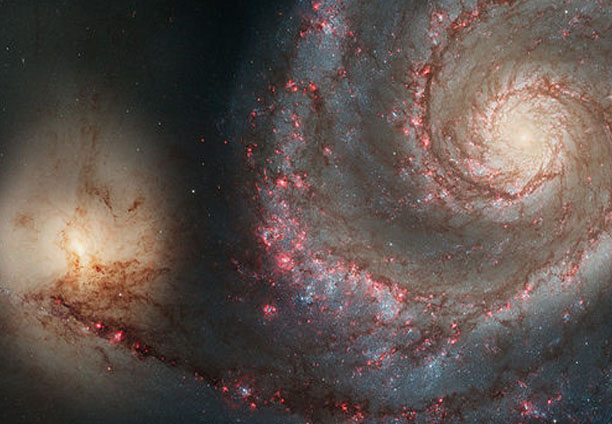
Lets place this image (File > Place). This new layer needs to be positioned directly under the moon layer so we should see this layer as a new background for the moon. We have now created a composite image using a mask.
Pixel and Vector Masks
In the last example what we specifically created was a pixel mask. Previously I mentioned that I would outline a superior method for creating the mask we needed for the moon layer. To do this we will use a vector mask. Anyone who uses Adobe Illustrator or another type of vector graphics application will understand something about vector graphics. For those who have never worked with Adobe Illustrator or used any of the vector tools in Photoshop such as the pen tool or shape layers, vector graphics are represented mathematically using points, lines and curves. They are then rendered as raster graphics when the file is output in some manner. The advantage of vector masks, (this will become clear in the next example) is that they are ideal for geometric shapes and can be easily edited after they have been created. In the previous example the perfect circular shape of the pixel mask would be very difficult to edit once it had been created.
Let’s go back to the original photo of the moon with the black background. Delete the mask we had previously created (Layer > Layer Mask > Delete - or mask thumbnail context menu > Delete Mask). This time I will use the ellipse tool. Before we create our shape we will want to make sure we are in path mode.
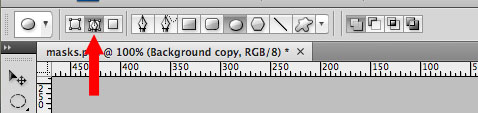
While holding down shift we can click and drag out a perfect circle over the moon. The size and position only needs to be approximate as you will see in the next step. At this point what we have created is a path. The beauty of using a path is that we can use transform tools to modify it very precisely before creating our mask or even after creating the mask. Immediately after creating our path select Edit > Free Transform Path. With the cursor positioned over the path object we can drag the circle so it is at the center of the moon (or use the arrow keys to nudge the object). Remember to press enter to apply the transform (or esc to abort the current transform). This time to create the mask we will use the Masks panel (Window > Masks). Click the ‘Add a vector mask’ button.

After creating the mask you may notice that there is a thin line indicating that the circle path that defines the mask is selected. If you click another layer or a blank area in the layers panel this will deselect the layer and you can see what the mask looks like without the path selected. You can tweak the shape at any time by clicking on the mask thumbnail and selecting Edit > Free Transform Path. With the mask thumbnail selected you will see 2 active useful sliders in the Masks panel. The Density slider can add overall transparency to the mask. The Feather slider is the key feature here as we can soften the hard edge of our shape. Just adding a 1px feather can make our mask effect look more natural.
A Note About Quick Mask Mode
You may have noticed the ‘Edit in Quick Mask Mode’ button at some point in your Photoshop explorations. This is more of a selection tool and is not directly related to layer masks. A mask and a selection are similar from the standpoint that they can both be represented as alpha channels. I will cover the use of this tool in a future article.
